How to Avoid Outdoor Lighting Glare: The Definitive Guide to Visual Comfort
How to avoid outdoor lighting glare. The proliferation of artificial illumination has fundamentally altered the nocturnal environment, often at the expense of visual comfort and biological rhythms. While light is a necessity for safety, navigation, and social interaction after sunset, the unintended byproduct of glare frequently negates the very benefits lighting is intended to provide. Glare is not merely a nuisance; it is a physiological phenomenon that reduces the eye’s ability to process contrast, effectively blinding the observer to the details within their field of vision.
The challenge of modern lighting design lies in the tension between perceived security and actual visibility. Often, the instinct to “add more light” leads to a compounding effect of high-intensity hotspots that create deep, impenetrable shadows nearby. This creates a high-contrast environment where the human eye, struggling to adapt to the brightest point in its view, loses its ability to see into the darker areas where potential hazards or intruders might reside.
Addressing this issue requires a shift from a quantity-based approach to a quality-based framework. It involves understanding the physics of light distribution, the anatomy of the human eye, and the architectural integration of fixtures. This exploration serves as a definitive guide for those seeking to reclaim the night through strategic, low-impact illumination that prioritizes clarity over raw brightness.
Understanding “How to Avoid Outdoor Lighting Glare”

At its core, glare is the result of excessive contrast between a bright light source and the surrounding darkness. To understand how to avoid outdoor lighting glare, one must first distinguish between its three primary manifestations: disability glare, discomfort glare, and blinding glare. Disability glare physically impairs the ability to see, often caused by light scattering within the eye. Discomfort glare creates an instinctive desire to look away or close the eyes, but doesn’t necessarily prevent the task at hand. Blinding glare is a temporary total loss of vision, such as when facing high-beam headlights on a dark road.
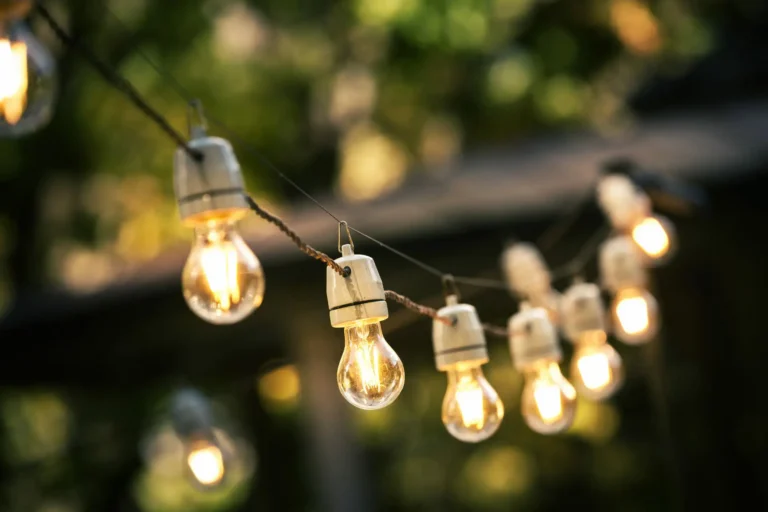
The common misunderstanding is that glare is a function of “too much light.” In reality, glare is a function of “misplaced light.” A 1,000-lumen bulb housed in a clear glass globe at eye level is a glare source; the same bulb housed in a fully shielded, downward-facing fixture becomes a functional light source. The goal is to illuminate the subject, not the source.
Oversimplification occurs when property owners rely solely on “lumens” as a metric for success. High lumen counts in unshielded fixtures actually decrease safety by creating a “black hole” effect where the pupil constricts to handle the glare, rendering everything outside the immediate beam invisible. True glare mitigation is an exercise in light placement, beam control, and the thoughtful selection of color temperatures that minimize atmospheric scattering.
Deep Contextual Background: The Evolution of the Night
Historically, outdoor lighting was a scarce resource. From oil lamps to early gas mantles, the intensity of light was low enough that glare was rarely a systemic issue. The shift began with the electrification of cities. Early incandescent bulbs were relatively dim, but as the mid-20th century introduced high-intensity discharge (HID) lamps, mercury vapor, metal halide, and high-pressure sodium, the sheer volume of light began to outpace our architectural ability to contain it.
The most significant shift, however, has been the “LED Revolution.” Light Emitting Diodes (LEDs) are inherently directional and capable of immense intensity from a very small surface area (a point source). While this efficiency is a marvel of engineering, it has exacerbated the glare problem. Older technologies tended to diffuse light more naturally; LEDs produce a concentrated “punch” that, if not properly diffused or shielded, creates severe visual fatigue.
Systemically, our legal and zoning frameworks have struggled to keep up. Many municipal codes still mandate minimum light levels based on outdated safety perceptions, unintentionally forcing developers to install high-glare fixtures to meet “foot-candle” requirements on the ground, regardless of the visual chaos they create at eye level.
Conceptual Frameworks and Mental Models

To effectively manage light, designers use several mental models that shift the focus from “brightness” to “visibility.”
1. The “Shielding First” Model
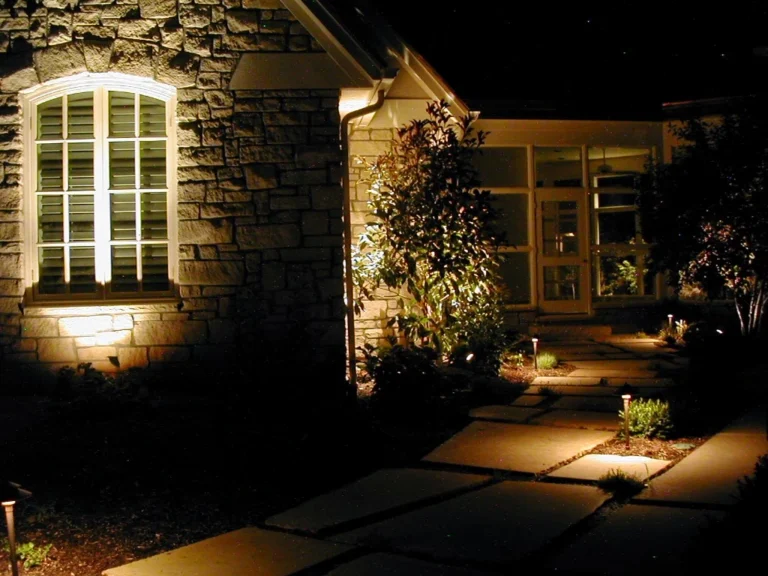
This framework posits that no light source should be visible from a horizontal or upward perspective. If you can see the “hot spot” of the bulb (the filament or the LED chip), the fixture has failed. The priority is “Full Cutoff” lighting, where the fixture housing extends below the light source, directing 100% of the output toward the ground.
2. The Contrast Ratio Theory
The human eye perceives brightness relative to its surroundings. This model focuses on maintaining a low ratio (typically 10:1 or 20:1) between the illuminated target and the adjacent dark areas. By smoothing out these transitions, the eye remains in a constant state of adaptation, preventing the “blinding” effect of high-contrast glare.
3. The Layered Lighting Approach
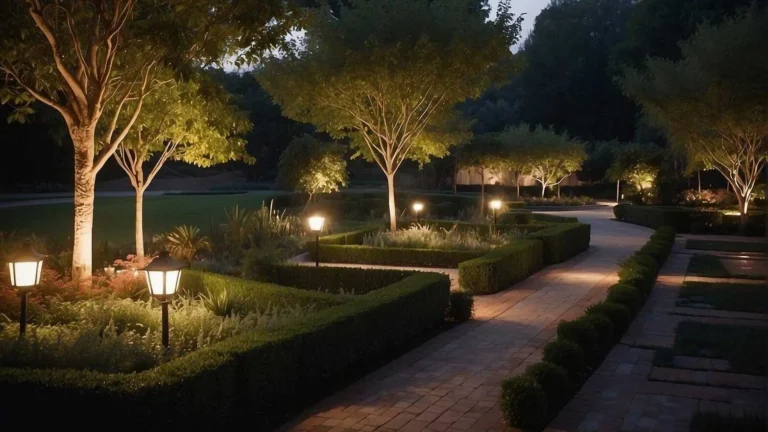
Instead of using one massive floodlight to cover an entire yard, this framework advocates for multiple, lower-intensity “layers” of path lighting, task lighting, and accent lighting. By distributing the light, you achieve the same total visibility with significantly less glare from any single point.
Key Categories and Technical Trade-offs
Mitigating glare requires choosing between various hardware configurations, each presenting unique benefits and limitations.
| Category | Primary Benefit | Trade-off | Ideal Use Case |
| Full Cutoff | Eliminates sky glow and direct glare | Narrower light footprint | Parking lots, street lighting |
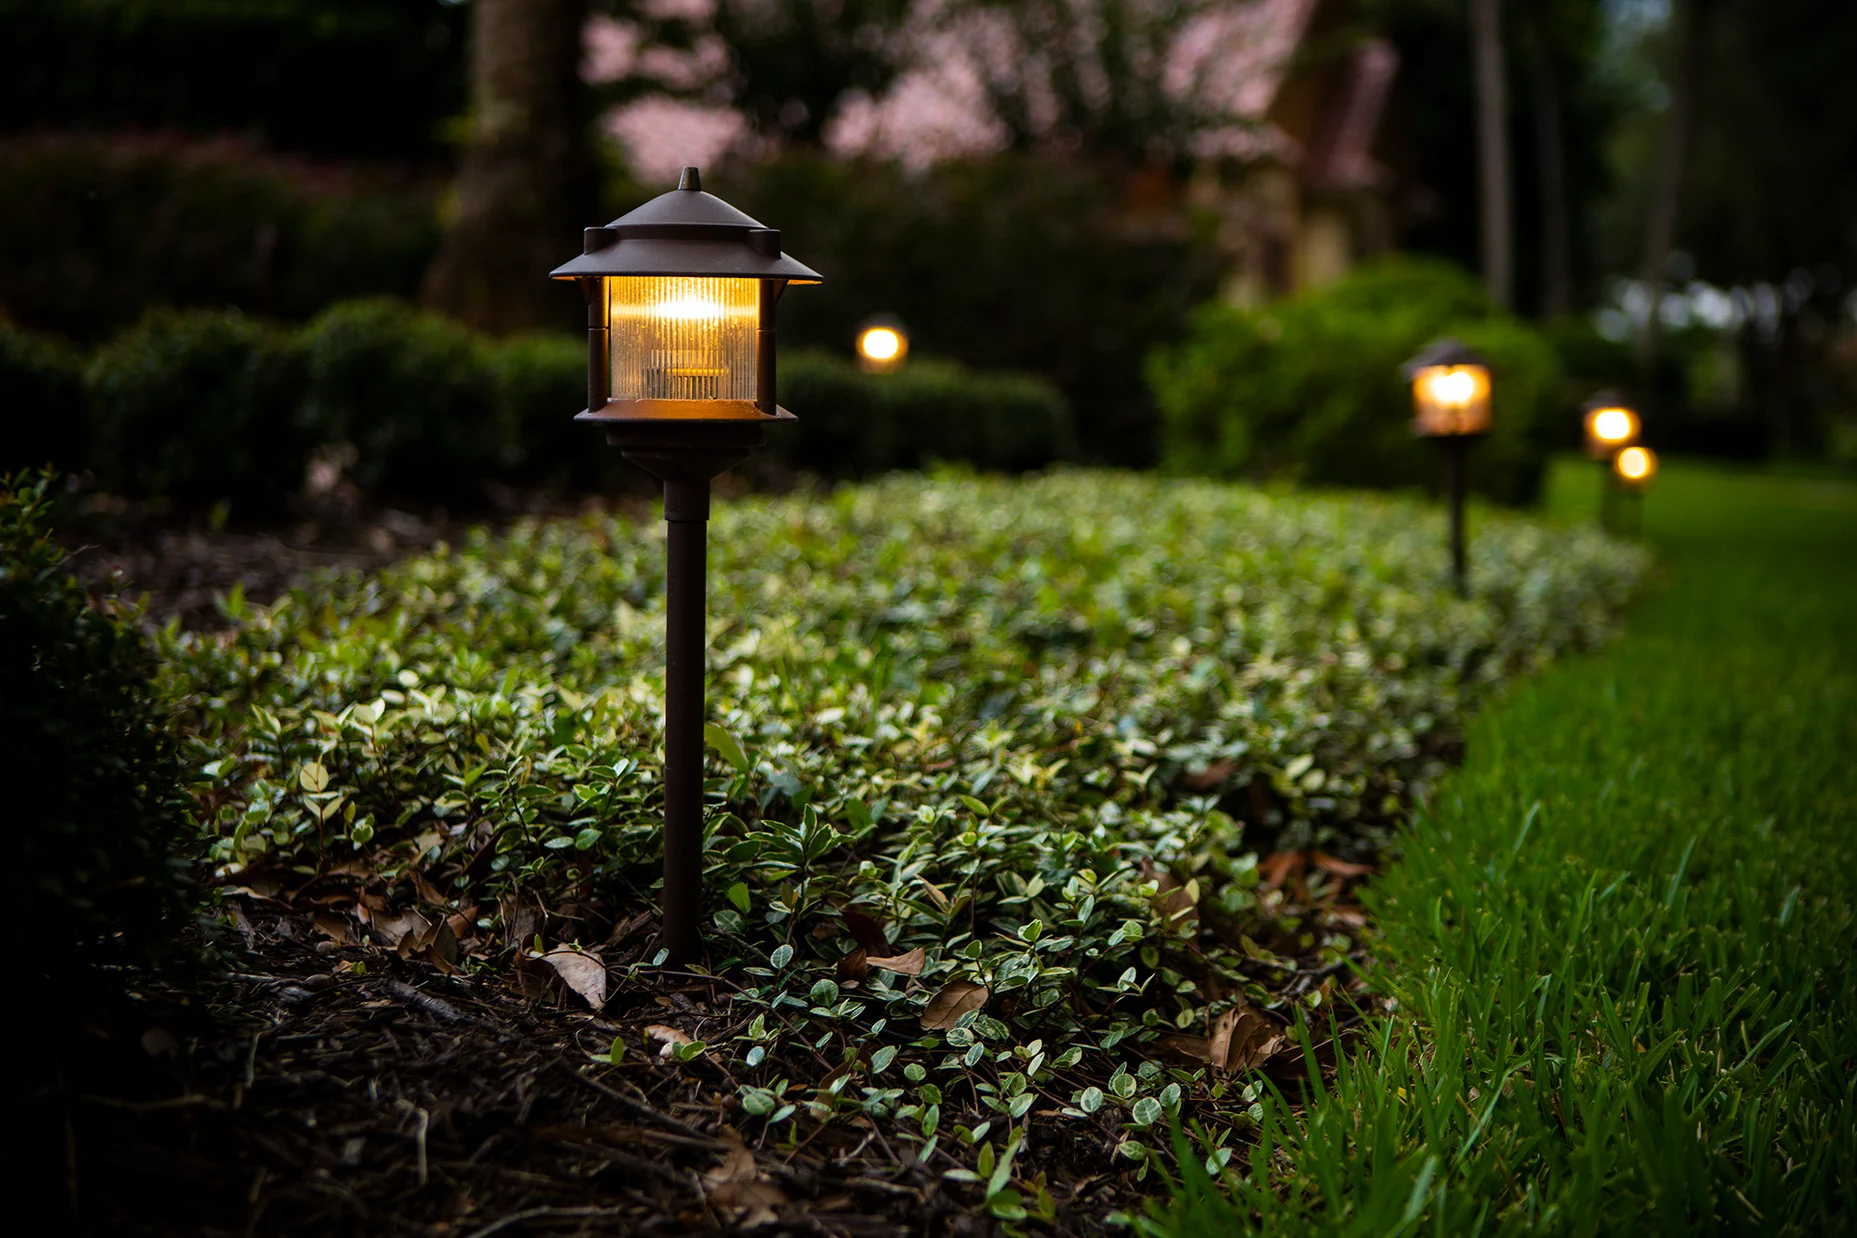
| Recessed Soffit | Total source concealment | Limited to architectural perimeters | Entrances, walkways near walls |
| Bollard (Shielded) | Low-level path illumination | Susceptible to physical damage | Garden paths, public parks |
| Diffused Lens | Softens the “point source” punch | Reduces overall light efficiency | Decorative residential porch lights |
| Directional Spot | Precise control of beam angle | Requires expert aiming to avoid a spill | Highlighting trees or statues |
Decision Logic: The “Path of Light”
When selecting a category, one must trace the light’s path. If the path from the source to the eye is direct, the fixture is a glare source. If the path is Source → Reflector → Surface → Eye, the glare is mitigated. The trade-off is often “coverage per fixture.” A shielded light may require more units to cover the same area, but the quality of the light is vastly superior.
Detailed Real-World Scenarios
Scenario A: The Residential Driveway
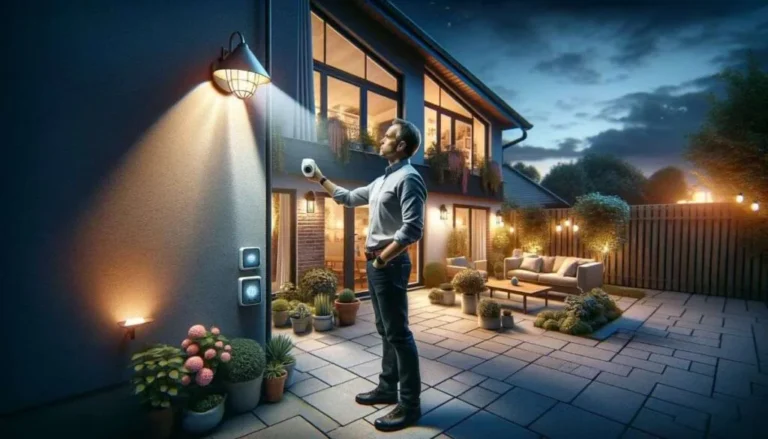
A homeowner installs a twin-head motion-sensor floodlight above the garage.
-
The Problem: The lights are aimed outward at a 45-degree angle. When triggered, they blind both the homeowner and drivers on the street.
-
The Correction: Re-aim the heads to point nearly straight down. Replace the high-wattage “cool white” bulbs with “warm white” (2700K) bulbs that have integrated “eyebrow” shields.
Scenario B: Commercial Retail Perimeter
A shopping center uses unshielded wall packs for security.
-
The Problem: The glare creates deep shadows behind dumpsters and vehicles—perfect hiding spots.
-
The Correction: Retrofit with “Forward Throw” full-cutoff fixtures. These push light away from the wall and onto the pavement without allowing light to escape above the horizontal plane.
Scenario C: The Landscape Accent
Lighting a large oak tree in a backyard.
-
The Problem: An upward-facing “well light” creates a pillar of light that misses the leaves and hits the neighbor’s second-story bedroom window.
-
The Correction: Switch to “moonlighting”—placing a shielded fixture high in the tree, aiming downward through the branches. This mimics natural light and keeps the source out of the line of sight.
Planning, Cost, and Resource Dynamics: How to Avoid Outdoor Lighting Glare
The financial aspect of glare reduction is often misunderstood as an “expensive” upgrade. While high-quality shielded fixtures can have a higher upfront cost, the long-term savings in energy (due to lower required wattage for the same perceived visibility) and the reduction in “light trespass” complaints provide a significant return.
Cost Estimates and Variability
| Component | Basic (High Glare) | Premium (Low Glare) | Economic Impact |
| Fixture Unit | $30 – $60 | $120 – $350 | Shielding and optics add to manufacturing cost |
| Installation | $75/hr | $100/hr | Low-glare requires precise aiming/positioning |
| Operational | High (wasted light) | Low (targeted light) | 20-40% energy savings with targeted optics |
Opportunity Cost: The primary hidden cost of failing to avoid glare is the loss of “visual range.” A high-glare system effectively reduces the usable square footage of a property at night because the eyes cannot see past the bright hotspots.
Tools, Strategies, and Support Systems
To successfully implement a glare-free environment, several tools and strategies are essential:
-
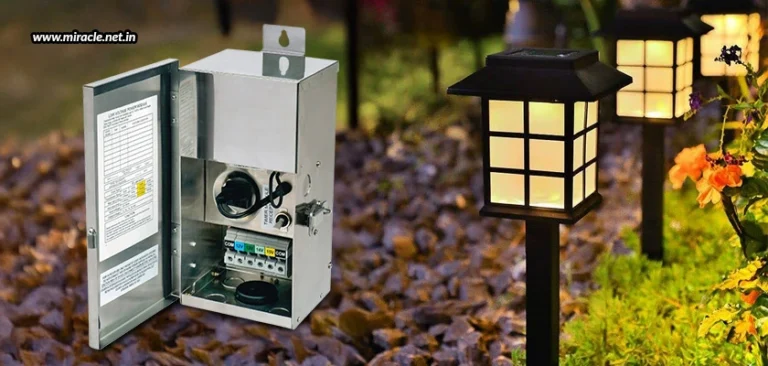
Shielding Accessories: “Snoots” or “Barn doors” for spotlights that physically block the light from certain angles.
-
Louvered Grids: Honeycomb inserts for fixtures that allow light to pass through straight but block it at side angles.
-
Warm Color Temperature: Utilizing 2700K or 3000K LEDs. Higher kelvin (5000K+) scatters more easily in the air (Rayleigh scattering), contributing to a “haze” that increases glare perception.
-
Dimmers and Timers: Reducing light levels after peak hours. Lowering intensity by 30% often has a negligible impact on visibility but a massive impact on comfort.
-
Frosted or Etched Glass: Softening the output of decorative fixtures where the bulb must be visible for aesthetic reasons.
-
Opaque Caps: For bollards or post lights, ensuring the top of the fixture is solid metal, not glass.
Risk Landscape and Failure Modes: How to Avoid Outdoor Lighting Glare
The “risk” of poorly managed lighting extends beyond aesthetic displeasure.
-
Compounding Fatigue: In public spaces, constant exposure to high-glare sources leads to pupillary fatigue, making individuals less alert to their surroundings.
-
False Security: The “Security Light” that blinds the camera. Many security cameras have a limited dynamic range; a bright unshielded light will “wash out” the image, making it impossible to identify faces.
-
The “Clutter” Effect: When multiple neighboring properties all have high-glare lighting, the visual landscape becomes a chaotic mess of competing sources, making it difficult for anyone to navigate safely.
Governance, Maintenance, and Long-Term Adaptation
Outdoor lighting is not a “set it and forget it” system. As vegetation grows, it may block or reflect light in unexpected ways.
Layered Maintenance Checklist:
-
Monthly: Check for shifting fixtures. Wind or accidental contact can knock a “cutoff” light into a “glare” position.
-
Quarterly: Clean lenses. Dirt buildup can actually increase glare by diffusing the light in uncontrolled directions.
-
Annually: Evaluate tree growth. Prune branches that are causing “backscatter” (reflecting light directly into eyes).
-
Every 5 Years: Assess LED degradation. As LEDs age, their color temperature can shift, sometimes becoming “bluer” and more prone to glare.
Measurement, Tracking, and Evaluation
How do you quantify a “glare-free” environment? It is partly subjective, but several metrics provide a baseline:
-
The BUG Rating: Developed by the Illuminating Engineering Society (IES), this measures Backlight, Uplight, and Glare. A “G” rating of 0 or 1 is the gold standard for glare control.
-
Foot-candle Uniformity: Instead of looking for a high maximum foot-candle reading, look for a low “max-to-min” ratio. A ratio of 3:1 or 4:1 indicates a very comfortable, low-glare environment.
-
Visual Acuity Testing: A qualitative measure. Can you see a person standing 50 feet away in the shadows? If the glare source prevents this, the system is failing.
Common Misconceptions and Oversimplifications
-
Myth: “Brighter is Safer.”
-
Correction: Visibility is safer. Brighter lights often create more shadows and more glare, reducing actual visibility.
-
-
Myth: “LEDs are naturally high-glare.”
-
Correction: LEDs are just the source. The fixture design determines the glare. An LED in a well-engineered housing is the most “controllable” light source available.
-
-
Myth: “Shielding light reduces its effectiveness.”
-
Correction: Shielding increases effectiveness by directing wasted skyward light back down to where it is actually needed.
-
-
Myth: “Motion sensors solve all problems.”
-
Correction: If the light is a glare source, it will still blind you when it turns on. The sensor is a trigger, not a shield.
-
Conclusion
The pursuit of “how to avoid outdoor lighting glare” is essentially a pursuit of visual harmony. It requires moving away from the “more is better” philosophy that has dominated the electrical age and toward a more nuanced, architectural understanding of how light interacts with the environment and the human eye. By prioritizing shielding, managing contrast ratios, and selecting appropriate color temperatures, we can create outdoor spaces that are both safe and welcoming.
Ultimately, the best lighting is that which we notice for the surfaces it reveals, not the fixture itself. As we adapt our modern technologies to respect the natural darkness of the night, the focus remains on the clarity of the view, the comfort of the observer, and the preservation of the nocturnal landscape.